Article
How a TPO roof patch is heat-welded: the repair process step by step
See how a roofer prepares, heat-welds, and checks a TPO patch over a damaged seam, with a repair diagram and manufacturer guidance for each stage.
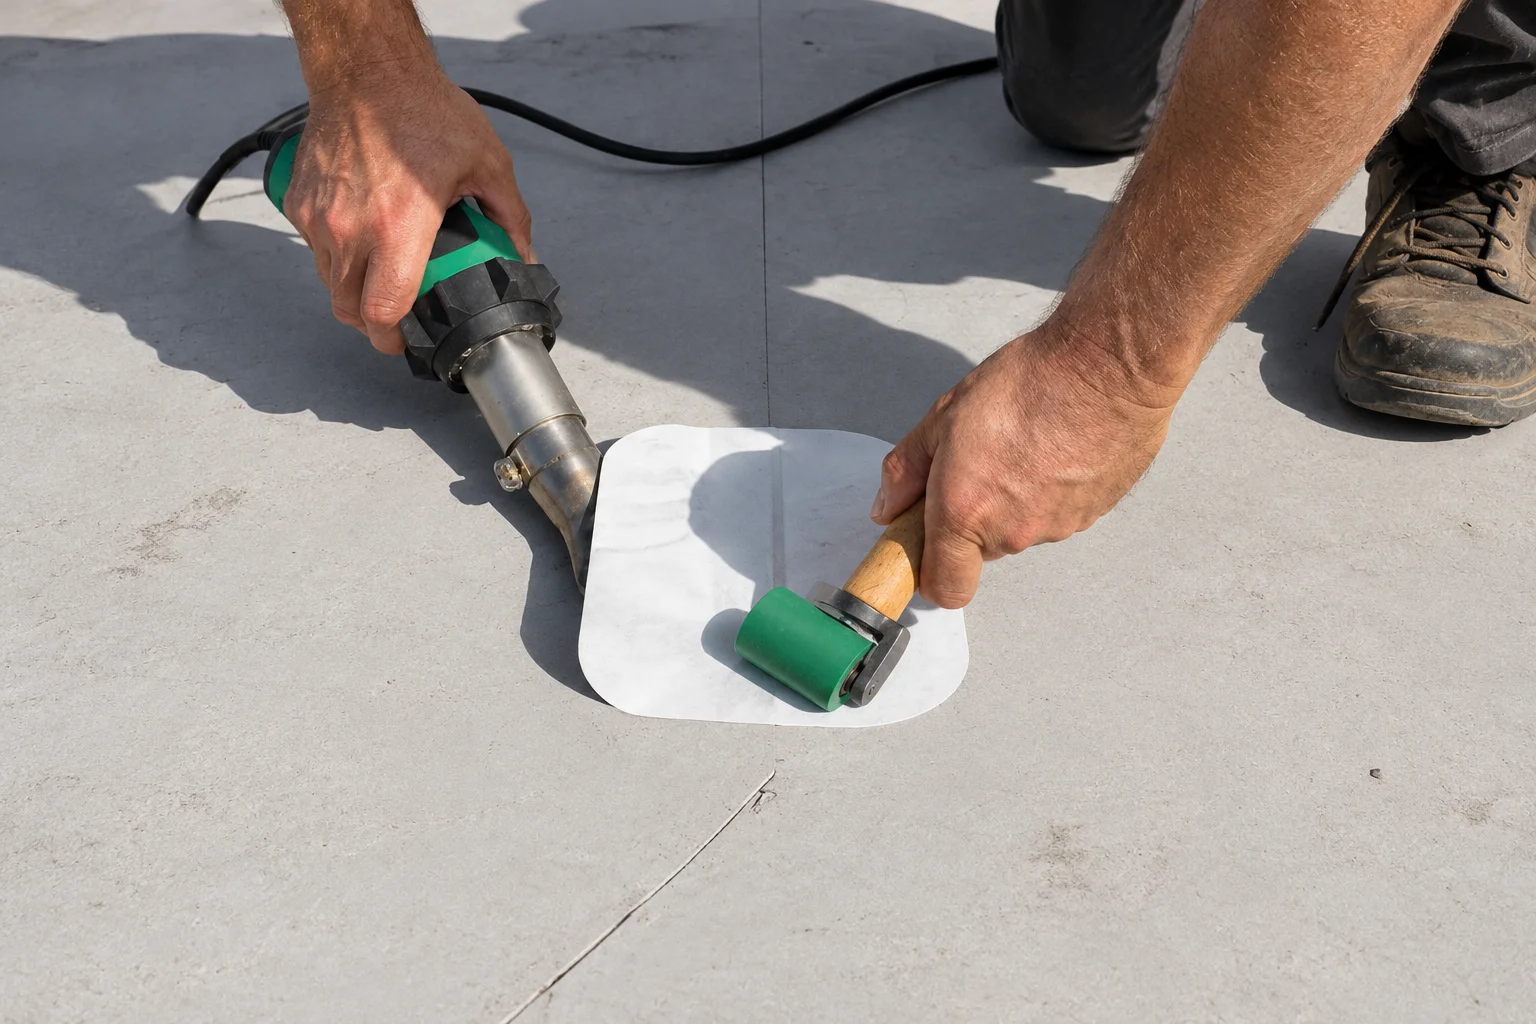
A TPO roof patch is heat-welded by directing hot air between compatible roofing layers and pressing the heated surfaces together with a hand roller. The repair depends on preparation, suitable membrane beyond the defect, a verified welding setup, and a continuous connection checked after cooling.
This article follows a patch over a damaged seam: the joint where roofing sheets meet. It explains what happens during the work and what a Property Manager should expect the contractor to check. The photograph illustrates the process; it is not a record of a completed FRSG repair.
Before the patch: is this the right repair?
A patch needs sound material to connect to. It also needs to address the identified leak source and the full extent of the defect. Covering an opening does not resolve concealed wet materials or explain why a seam is tearing.
If you are still deciding whether a local repair is enough, start with Flat roof leaks: what a Property Manager needs to know. That guide covers what an inspection finds, how leaks are traced, and the circumstances that can call for a larger scope.
What the welder and roller actually do
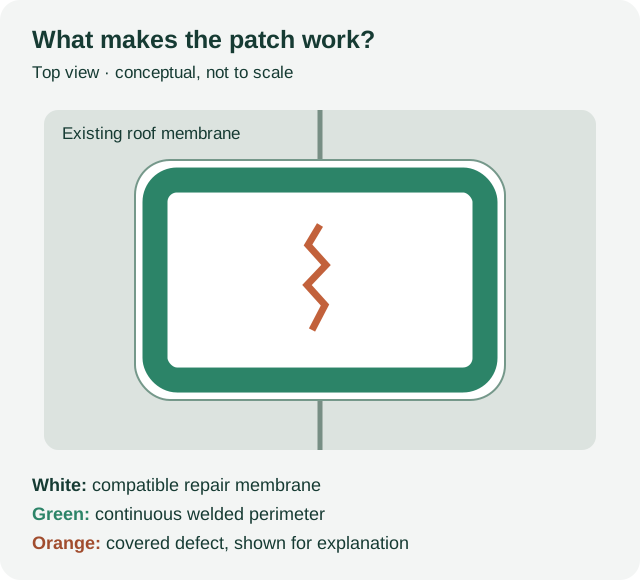
A welded patch covers the defect and forms a new waterproof connection around it. The roofer directs hot air between the patch and existing membrane, then uses roller pressure to fuse the heated surfaces. The patch must connect to suitable material beyond the damage.
In the opening image, the hot-air welder is on the left and the green hand roller is on the right. They perform different parts of the same operation: heating the contacting surfaces and pressing them together. The image illustrates the method; it cannot establish weld strength or the condition beneath the roof.
1. Establish how far the damage extends
Before covering a tearing seam, determine whether it is an isolated defect or part of a longer failure. The proposal should identify anything else that needs correction, such as attachment or supporting-material damage. A short opening and an entire failed seam do not necessarily receive the same repair detail.
2. Clean and dry the welding surfaces
Prepare the existing membrane using its manufacturer’s procedure. Carlisle identifies Weathered Membrane Cleaner for preparing in-service TPO before hot-air welding. Cleaning removes contaminants that could interfere with the connection; follow the product instructions before applying heat. Carlisle cleaner information
GAF requires welding surfaces to be clean, dry, and free of rain, dew, and other moisture. Washing the area alone does not establish that it is ready to weld. GAF installation manual
3. Fit compatible repair membrane
Identify the roof system and select the appropriate patch material, size, and overlap from the manufacturer’s repair detail. Carlisle lists separate TPO and PVC repair materials and cleaners; similar appearance does not make them interchangeable. Carlisle inspection repair materials
The patch pictured has rounded corners. Its appearance cannot establish its thickness, compatibility, or overlap dimensions. Those specifications come from the identified system and defect, not measurements guessed from a photograph.
4. Verify the welding setup
A test weld checks the setup before it is relied on for the repair. Heat, travel speed, pressure, material, and conditions affect the result. There is no single temperature setting that guarantees a good repair on every roof. Carlisle recommends test welds before work each morning and afternoon, with the sample assessed after cooling. Carlisle test-weld guidance
5. Heat between the layers and roll the connection
The roofer introduces the welder’s flat nozzle between the patch and the existing membrane. Hot air heats the two contacting surfaces. As the nozzle advances, controlled pressure from the hand roller brings those surfaces together at the heated connection.
GAF describes rolling across the nozzle mouth to press the layers together and accomplish the weld. The roofer works around the patch to form the continuous welded perimeter required by the detail. Simply heating the top or pressing the patch flat does not demonstrate a completed weld. GAF hand-welding instructions
6. Let the weld cool, then check its perimeter
Once the connection has cooled sufficiently, a seam probe is used to check for openings or incomplete connections. Deficiencies are repaired, allowed to cool, and checked again. Carlisle warns that probing too early can damage a warm weld. Carlisle seam-checking guidance
Complete any system-specific finishing details. Where required, cut-edge sealant treats exposed reinforced TPO edges; it does not replace the welded connection. GAF field guide
These steps explain what the contractor is doing and what a Property Manager should expect documented. Product-specific dimensions, settings, and details belong to the applicable manufacturer instructions and trained installer.
What should the repair record show?
Ask for photographs of the original defect and completed repair, identification of the repair material, and a description of the checks performed. If additional problems were found, the record should say what was addressed and what still needs attention.
The photograph of a finished patch shows where work took place. The accompanying explanation should tell you why the repair was selected and how its connection was checked. Keep both with the building’s roof records, and report any returning leak with its location and the conditions when it appeared.
Thanks for your feedback.
About FRSG
Flat Roof Systems Group (FRSG) is a commercial flat-roof repair contractor serving Property Managers across Oregon and Washington. FRSG stops active leaks, makes permanent Roof Repairs with clear documentation and predictable pricing, and proposes a Full Reroof only when an inspection shows that repairing would cost more than it saves. Every visit ends with a Service Record: the problem reported, the work done, and photographs of the roof as FRSG left it.